Transform Your Kitchen: Painting Countertop Made Simple!
Table of Contents
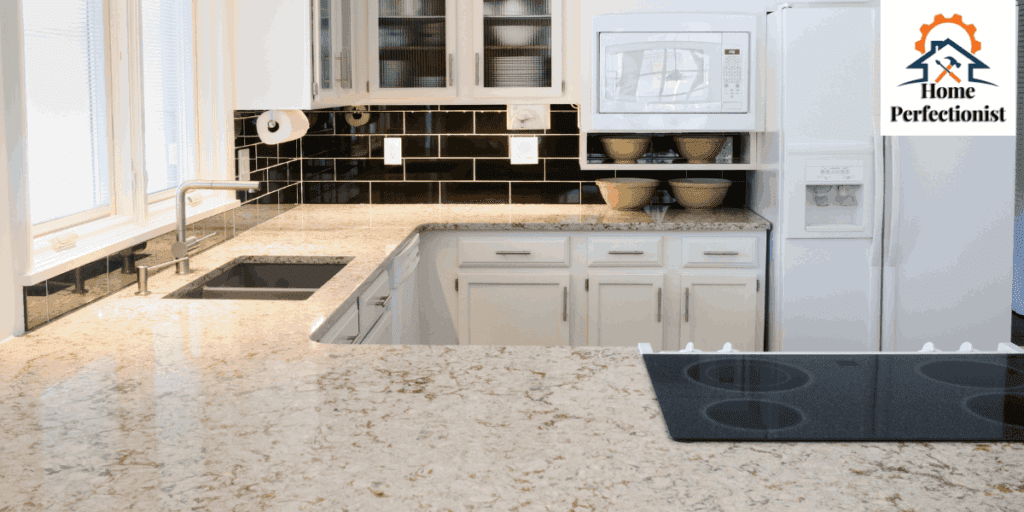
ToggleEmbarking on a DIY project to paint your kitchen countertops can dramatically upgrade the look of your space. It’s a cost-effective, fun way to turn a dated area into a modern masterpiece. I started this journey last year, applying a high-end marble finish that truly transformed my kitchen. This option wasn’t just affordable; it added significant value to my home by upgrading an eyesore into a style statement.
The process involves several factors, from selecting the right paint to mastering the application technique, ensuring a smooth, professional look. Customizing your color preferences and matching them with your cabinets and floor can enhance the overall style and feel of your kitchen and bathrooms. Through sharing my experiences and the benefits of easier maintenance, I’ve learned that this method is not just about aesthetics but also about creating a practical, usable space that meets your everyday needs without the hefty price tag of a full replacement.
Considerations for Painting Countertops
Painting your countertops offers an appealing alternative to replacing them, particularly when considering budget constraints. For homeowners with laminate, wood, ceramic, or tile surfaces, the right painting technique and materials can rejuvenate your kitchen or built-in office nook. This method uses specialized products such as peel-and-stick wraps and refinishing kits designed to yield realistic and suitable results. The benefits of this approach include cost savings and the ability to customize the look of your countertops to match your home’s aesthetic.
Embarking on this project requires patience and attention to detail. You’ll need to be ready to work carefully, following all instructions to ensure a durable finish. While this task is not necessarily harder than other DIY projects, it demands consistent effort and a steady hand. As you prepare, think about how the new paint will integrate into your daily use of the space. Properly executed, painted countertops can transform your space with a fresh, new look without the full expense and hassle of complete resurfacing.
Advantages of Refinishing Your Countertops
- Cost-effective: Painting your countertops is a budget-friendly alternative to replacing them. The total cost is a mere fraction of what you would spend on new granite or laminate surfaces.
- DIY-friendly: This project is perfect for beginners and can be a fun family activity. My daughters, who were quite young at the time, helped with adding veining details, making it a memorable experience.
- Customization options: You can choose from a variety of colors and techniques to match your kitchen’s aesthetic. Whether you want a sleek, smooth look or something more unique, painting allows you to customize your space.
- Durability and safety: With the right preparation and materials, including non-toxic, low-VOC paints and robust sealers, your painted countertops can be both durable and food-safe.
- Quick transformation: The entire process can be completed in just a few days, much faster than replacing countertops. Plus, you don’t have to tear out the old ones, which saves time and reduces mess.
- Environmentally friendly: By choosing to refinish rather than replace, you reduce waste and utilize environmentally friendly products, contributing to a healthier planet.

Disadvantages of Painting Countertops
- Time-consuming: Preparing and painting your countertops is a project that can’t be rushed. From sanding the existing surfaces to applying multiple coats of paint and sealer, each step needs time to dry thoroughly before moving on to the next.
- Material limitations: Not all countertop materials, like granite or stone, are suitable for painting. You may find it hard to achieve a smooth, durable finish on these surfaces without the proper primers and sealants, such as polyurethane.
- Functionality trade-offs: Painted countertops may require you to stop using your kitchen or bathroom for several days. Additionally, they can’t withstand high temperatures, so placing hot pots and pans directly on them could damage the finish.
- Maintenance and care: While low-VOC and no-VOC products are environmentally friendly and safer for food-safe areas, painted surfaces may not be as hard or resistant to wear and tear as unpainted ones, raising concerns about their long-term durability and the need to recoat periodically.
- Expertise required: Achieving a professional look requires a certain level of skills and confidence in DIY abilities. You might consider hiring a professional, which can significantly raise the cost compared to doing it yourself.
Materials and Tools for Painting Countertop
Here’s a detailed list of materials and tools needed for painting countertops, whether aiming for a marble effect or a simpler finish:
| Materials/Tools | Purpose/Use |
| Putty knife | To remove old silicone caulking |
| Rubbing alcohol | To clean caulking residue and prep surfaces |
| Scouring pad | For removing grease and dirt |
| Laquer Thinner | Specifically for granite countertops cleaning |
| Sandpaper | To smooth the surface and sand filled areas |
| Wood filler | To fill gouges, seams, or imperfections |
| Damp cloth | To clean off dust after sanding |
| Painter’s tape | To protect non-painted areas like stovetops and cabinet edges |
| Primer | To ensure paint adherence, suitable for the specific countertop material |
| Foam brush or roller | For smooth application of primer and paint |
| Paint (base color and vein color) | Light base color for overall coating and gray mineral paint for veining effects |
| Artist’s brush | For creating detailed and realistic marble veins |
| Spray bottle | To mist water on veins for blending |
| Top coat or glossy resin | To seal and protect the painted surface |
| Degreaser or kitchen cleaner | For deep cleaning countertops prior to priming |
| Water-based acrylic or epoxy | Paint choice depending on countertop material (acrylic for laminate, epoxy for granite) |
| Sealer | To enhance durability and provide a finishing touch |
This table is structured to assist in gathering all necessary items before beginning the countertop painting project, ensuring that both the aesthetic and protective aspects of the process are addressed.

How to Paint Countertops to Look Like Marble
Step 1: Preparation and Cleaning
Begin by removing any silicone caulking from the edges of the countertops using a putty knife, then clean up any caulking residue with rubbing alcohol. Prep your surface for painting by thoroughly cleaning it with a scouring pad to remove all grease and dirt. This includes special attention to granite counters, which need to be wiped down with laquer thinner following the initial clean to ensure all residues are removed.
Step 2: Sanding and Filling
Sand down the surface to create a smooth base, particularly if there are any deep gouges, seams, or other imperfections. Use wood filler to fill these imperfections, then sand the filled areas once they are dry. Clean the dust off with a damp cloth to ensure a dust-free surface for priming.
Step 3: Taping and Priming
Tape off any obstacles and borders, such as the stovetop and the edge of cabinets, to protect them from paint. Apply a coat of primer suitable for the countertop material using a foam brush or roller. Allow the primer to dry thoroughly as per the product’s instructions.
Step 4: Painting Base Layer
After the primer has dried, apply your base layer of paint. Use a roller to apply a THIN coat of paint to the larger, flat surfaces of your countertops. If aiming for a marble effect, select a light base color like white or light gray.
Step 5: Adding Veins
Create thin, realistic veins using a gray mineral paint and an artist’s brush. Drag the brush lightly across the surface to mimic natural marble veins. Mist the veins with water from a spray bottle to help them blend into the base coat more naturally.
Step 6: Sealing and Finishing
Once the paint has dried and you’re satisfied with your faux marble effect, apply a top coat or glossy resin to seal the paint. Ensure the top coat is applied evenly and allows it to cure as recommended before using the countertop.

How to Paint Countertops Simply
Step 1: Cleaning and Degreasing
Start by thoroughly cleaning your countertops to remove all traces of oil, grime, and dirt. Use a strong degreaser or a kitchen cleaner designed for your type of countertop. Ensure the surface is completely clean and dry before proceeding to the next step.
Step 2: Sanding
Lightly sand the countertop surface to improve the adherence of the primer and paint. This step is crucial for creating a surface that the primer can bond to effectively. Clean off any sanding residue thoroughly.
Step 3: Applying Primer
Use a roller to apply a coat of primer that is compatible with your countertop material. This will help ensure that the paint adheres properly and provides a uniform base for the topcoat. Allow the primer to dry as specified by the manufacturer.
Step 4: Painting
Select a paint that is suited for the countertop material, such as water-based acrylic for laminate or epoxy coatings for granite and tile. Apply the paint in even, smooth strokes, ensuring to cover all areas thoroughly. Allow each coat to dry before applying the next.
Step 5: Sealing
After the final coat of paint has dried, apply a sealer to protect the paint from wear and tear. Use a roller to apply the sealer evenly across the surface. This will also enhance the durability and the aesthetic finish of the painted countertops.


