
Knee Wall Insulation: A Comprehensive Guide to Energy Efficiency and Comfort
Introduction
Knee wall insulation is critical in homes with sloped ceilings, attics, or story-and-a-half designs, such as Cape Cod and Bungalow-style homes. These short, load-bearing walls are often found in attics or bonus rooms above garages and play a vital role in maintaining structural integrity. However, insulating knee walls can be challenging due to the cramped spaces between roof rafters and attic floors. Proper insulation is essential for regulating indoor temperatures, reducing energy costs, and preventing issues like ice dams, moisture buildup, and air leaks.
From my experience in home-performance contracting, I’ve seen how improper insulation can lead to significant energy losses. Cold air can infiltrate through cracks, electrical boxes, or unsealed soffit vents, while poorly installed fiberglass batts or blown insulation can leave joist bays vulnerable. Homeowners can create a more comfortable, energy-efficient living space by addressing these issues with effective air sealing and the right insulation materials.
This guide will explore the best practices for knee wall insulation, including material choices, installation techniques, and the benefits of proper insulation. Whether you’re building a new home or upgrading an existing one, this article will help you make informed decisions to optimize your home’s performance.
Why Knee Wall Insulation Matters
Knee walls are often overlooked in home insulation projects but play a significant role in energy efficiency and comfort. Here’s why proper knee wall insulation is essential:
- Energy Efficiency: Uninsulated or poorly insulated knee walls can lead to significant heat loss in winter and heat gain in summer, driving up energy bills.
- Comfort: Insulating knee walls helps maintain consistent indoor temperatures, reducing drafts and cold spots.
- Moisture Control: Proper insulation prevents condensation and humidity buildup, which can lead to mold and structural damage.
- Ice Dam Prevention: Insulating knee walls and sealing air leaks can help prevent ice dams, which can damage roofs and gutters.
- Compliance with Building Codes: Proper insulation ensures your home meets local building codes and Energy Star requirements, improving its overall performance and value.
Challenges of Knee Wall Insulation
Knee walls present unique insulation challenges due to their location and design. Common issues include:
- Air Leaks: Gaps around electrical boxes, soffit vents, and unsealed cracks can allow cold air to infiltrate the living space.
- Improper Installation: Fiberglass batts that are poorly installed can fall out or flop over, leaving joist bays uninsulated.
- Moisture Buildup: Without proper ventilation and vapor barriers, knee walls can trap moisture, leading to mold and rot.
- Limited Space: The cramped space between roof rafters and attic floors makes installation difficult, especially in older homes.
To overcome these challenges, using the right materials and techniques, such as air sealing, blocking, and proper ventilation is essential.
Best Insulation Materials for Knee Walls
Choosing the right insulation material is crucial for maximizing energy efficiency and comfort. Here are the top options for knee wall insulation:
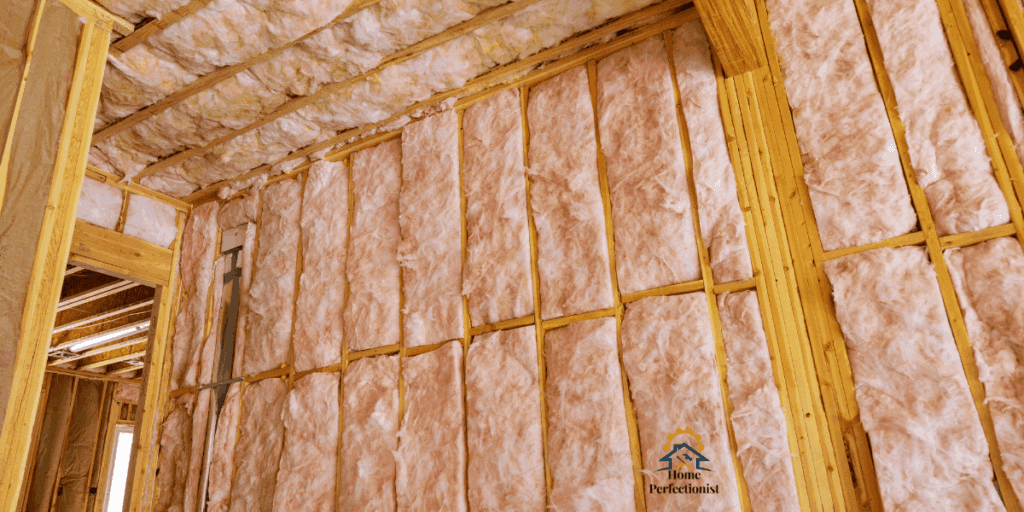
1. Fiberglass Batts
- Pros: Cost-effective, easy to install, and widely available.
- Cons: Requires precise installation to avoid gaps and air leaks.
- Best For: Homeowners on a budget or DIY projects.
2. Rigid Foam Board
- Pros: High R-value, acts as a vapor barrier, and provides excellent thermal resistance.
- Cons: More expensive than fiberglass and requires careful cutting and fitting.
- Best For: Extreme climates and areas prone to moisture.
3. Spray Foam Insulation
- Pros: Highest R-value, excellent air sealing, and fills hard-to-reach spaces.
- Cons: Expensive and requires professional installation.
- Best For: Maximizing energy efficiency and sealing air leaks.
4. Blown-In Insulation
- Pros: Fills gaps and irregular spaces, improves energy efficiency, and reduces drafts.
- Cons: Requires professional installation and may settle over time.
- Best For: Attics and knee walls with irregular shapes.
How to Choose the Right Insulation for Your Knee Walls
Selecting the best insulation for your knee walls depends on several factors, including your climate, budget, and the specific challenges of your home’s design. Here’s a step-by-step guide to help you make the right choice:
1. Assess Your Climate
- Cold Climates: In regions with harsh winters, prioritize materials with high R-values, such as spray foam or rigid foam board, to prevent heat loss and ice dams.
- Hot Climates: For warmer areas, focus on materials that provide excellent air sealing and moisture resistance, like spray foam or blown-in insulation.
- Mixed Climates: In areas with hot summers and cold winters, opt for versatile materials like spray foam or a combination of rigid and fiberglass batts.
2. Evaluate Your Budget
- Low Budget: Fiberglass batts are the most cost-effective option, though they require careful installation to avoid gaps.
- Mid-Range Budget: A rigid foam board balances cost and performance, providing high R-values and moisture resistance.
- High Budget: Spray foam insulation is the most expensive but delivers superior energy efficiency, air sealing, and long-term savings.
3. Consider Installation Complexity
- DIY-Friendly: Fiberglass batts and rigid foam boards are suitable for DIY projects, provided you follow proper installation guidelines.
- Professional Installation: Spray foam and blown-in insulation typically require professional installation to ensure optimal performance and safety.
4. Address Moisture Concerns
If your home is prone to moisture buildup, choose materials that act as vapor barriers, such as rigid or closed-cell spray foam. Additionally, ensure proper ventilation to prevent condensation and mold growth.
5. Check Local Building Codes
Always consult local building codes and Energy Star guidelines to ensure your insulation meets the required R-values and safety standards. This step is crucial for both compliance and maximizing energy efficiency.
By carefully considering these factors, you can select the insulation material that best suits your needs, ensuring a comfortable, energy-efficient home for years.
Effective Knee Wall Insulation Techniques
To ensure optimal performance, follow these best practices for knee wall insulation:
- Air Sealing: Seal gaps, cracks, and penetrations with caulk or canned foam to prevent air leaks.
- Install Blocking: Use rigid foam or wood blocking around the perimeter of the knee wall to prevent cold air infiltration.
- Use an Air Barrier: Install materials like drywall, OSB, or ThermoPly to create an airtight seal.
- Proper Ventilation: Install attic baffles or air chutes to promote airflow and prevent moisture buildup.
- Follow Building Codes: Ensure your insulation meets local building codes and Energy Star requirements.

Common Mistakes to Avoid When Insulating Knee Walls
Even with the best materials and techniques, mistakes during the insulation process can undermine your efforts and lead to energy inefficiency, moisture problems, and discomfort. Here are some common pitfalls to watch out for and how to avoid them:
1. Neglecting Air Sealing
- Mistake: Failing to seal gaps, cracks, and penetrations before installing insulation.
- Solution: Use caulk, canned foam, or weatherstripping to seal all air leaks around electrical boxes, soffit vents, and framing. This step is crucial for preventing drafts and maximizing insulation effectiveness.
2. Improper Installation of Fiberglass Batts
- Mistake: Leaving gaps, compressing batts, or allowing them to sag.
- Solution: Ensure batts fit snugly between studs without gaps or compression. Use staples or insulation supports to hold them in place securely.
3. Ignoring Ventilation Needs
- Mistake: Blocking soffit vents or failing to install attic baffles can lead to moisture buildup and ice dams.
- Solution: Install attic baffles or air chutes to maintain proper airflow from the soffit to the ridge vent. This helps regulate temperature and prevents condensation.
4. Using the Wrong Insulation Material
- Mistake: Choosing insulation based solely on cost without considering R-value, moisture resistance, or compatibility with your climate.
- Solution: Evaluate your specific needs, such as climate, budget, and moisture risk, before selecting an insulation material.
5. Skipping Vapor Barriers
- Mistake: Failing to install a vapor barrier in areas prone to moisture can lead to mold and rot.
- Solution: Use rigid or closed-cell spray foam as a vapor barrier, especially in humid climates or unconditioned spaces.
6. Overlooking Building Codes
- Mistake: Ignoring local building codes and Energy Star requirements can result in subpar insulation and potential safety issues.
- Solution: Always consult local codes and guidelines to ensure your insulation meets the required R-values and safety standards.
7. Inadequate Insulation Thickness
- Mistake: Using insulation that is too thin, reducing its effectiveness.
- Solution: Choose the appropriate thickness based on the material’s R-value and your climate zone. For example, aim for at least R-13 to R-21 for knee walls in most regions.
By avoiding these common mistakes, you can ensure your knee wall insulation performs optimally, providing long-lasting energy efficiency, comfort, and protection for your home.

Benefits of Proper Knee Wall Insulation
Investing in proper knee wall insulation offers numerous benefits, including:
- Reduced Energy Bills: Minimize heat loss and gain, lowering heating and cooling costs.
- Improved Comfort: Maintain consistent indoor temperatures and eliminate drafts.
- Moisture Prevention: Reduce the risk of mold, rot, and structural damage.
- Increased Home Value: Energy-efficient homes are more attractive to buyers and command higher prices.
- Sustainability: Lower your carbon footprint by reducing energy consumption.
Conclusion
Proper knee wall insulation is essential for creating a comfortable, energy-efficient home. By choosing the right materials, such as spray foam, fiberglass batts, or rigid foam boards, and following best practices for installation, you can prevent energy loss, improve indoor comfort, and protect your home from moisture-related issues.
Whether you’re building a new home or upgrading an existing one, investing in knee wall insulation is a wise decision that pays off in the long run. Always consult local building codes and consider working with a professional to ensure the best results.
By taking these steps, you’ll enhance your home’s performance and contribute to a more sustainable future.
Knee Wall Insulation: (FAQs)
1. Why is knee wall insulation important?
Knee wall insulation is crucial for preventing heat loss in winter and heat gain in summer, improving energy efficiency, and maintaining indoor comfort. It also helps prevent moisture buildup, mold growth, and ice dams that damage your home’s structure.
2. What is the best type of insulation for knee walls?
The best insulation depends on your budget, climate, and home design. Common options include:
- Fiberglass batts (budget-friendly but requires careful installation)
- Rigid foam board (high R-value and moisture resistance)
- Spray foam (best air sealing but expensive)
- Blown-in insulation (good for irregular spaces but may settle over time)
3. How do I prevent air leaks in knee wall spaces?
Air leaks can be sealed using caulk or spray foam around electrical outlets, soffit vents, and framing. Installing rigid foam board or an air barrier (like drywall or OSB) also helps prevent drafts.
4. Do I need a vapor barrier when insulating knee walls?
A vapor barrier is recommended in humid or cold climates to prevent moisture buildup. Materials like rigid foam and closed-cell spray foam act as built-in vapor barriers, but a separate vapor barrier may be necessary if using fiberglass batts.
5. Can I insulate knee walls myself, or should I hire a professional?
If you’re comfortable with DIY projects, fiberglass batts and rigid foam boards can be installed with careful attention to detail. However, spray foam and blown-in insulation typically require professional installation to ensure effectiveness and safety.